React Native: a tool for mobile development
In 2015, React Native was launched by Facebook as the JavaScript framework to build mobile apps for both iOS and Android. It uses the same concepts and ideas from React. React Native allows you to create mobile apps for both iOS and Android with a single code base. This is known as the Hybrid Mobile development.
In previous years before React Native was launched, developers had to build and maintain two separate applications for both iOS and Android. Objective C/Swift is used to build iOS applications while Java/Kotlin is used for Android development. This was an issue for some companies and startups as they have to hire two different teams of mobile developers, one for iOS and one for Andriod. But now, with React Native, you can write once and run everywhere.
In addition to this, React Native is written in JavaScript, a popular language used for web development. The JavaScript code is then rendered with Native code on the devices. This implies that with a suitable architecture, developers can now write JavaScript/React code that can run on different platforms. Also, with the power of JavaScript behind React Native, the code runs fast, compiles seamlessly, and gives developers the ability to write code at a lightning speed.
Another tool that is being used for hybrid mobile development like React Native is Flutter, an open-source framework by Google built with Dart programming language.
Prerequisites for learning React Native
A basic understanding of JavaScript fundamentals is required to learn React Native. These javaScript fundamentals include concepts of variables, functions, objects, data types, loops, conditional statements, and so on. To brush up on JavaScript, check out this MDN tutorial guide.
Even though the knowledge of React, Android, or Swift development is not compulsory, having basic knowledge about these will be of great help while learning React Native. Most especially, React, understanding JSX, creating components, passing props, hooks, state management, and so on are good to know before delving into React Native. Brush up on React here.
Some React Native built-in Core Components
React Native comes with a quite number of ready-made built-in components which serve as the building block for building complex components and features. Below are some of the important and most used components. To see the full list, check here.
Text
The Text component is like the <p> tag in HTML. It wraps every string or text to be displayed in our app. Unlike on the web where text can be displayed without necessarily putting it in a <p> of a similar tag, the <Text> component must always be used to wrap text in React Native, otherwise, the code would throw an error.
View
The View component is similar to the <div>tag in HTML. It wraps around other elements and components. It can be used to group a single component to form a more complex component. It is the most fundamental component for building a UI, it can be nested in other View components and can have 0 to many children nested in it.
Image
To display an image in React Native, you need to import the Image component and pass in the source of the image. More detail on how to use the Image page can be found here
import { Image, View} from 'react-native';

const DemoApp = () => {
  return (
    <View>
      {/* This is an Image */}
      <Image
        source={{
          uri: 'link_to_the_image',
        }}
      />
    </View>
  );
};
ScrollView and FlatList
ScrollView allows you to display scrollable content. When you need to fit a long text into a specified height, then ScrollView is the go-to component to use. It renders all the content at once and thereby not suitable for a large amount of data because this affects the app's performance.
On the other hand, FlatList also allows us to render scrollable content in a more performant way. It is best used in rendering a list of items in an efficient way. It supports pull-to-refresh, scroll loading, scroll-to-index features, and other nice features. Check out the full documentation here
TextInput
This is the equivalent component for both input and textarea tags in HTML. It is a way to input text into the app using the keyboard. It is one of the foundational components used in mobile development. The component is configurable, several features can be configured easily. For example, the keyboard type to show, be it numeric, alphanumeric, or alphabets can be specified using the type prop available on the component. Also, there are several events available on the component to define how it behaves. Check out the full documentation here.
Button
The button component has two properties that are required. The onPress and the title properties. The onPress prop takes in a function that defines what happens when the button is pressed/clicked. The title prop is the text that shows up as the button. There are some other inbuilt button-like components. One of them is TouchableOpacity that when pressed down, the opacity of the wrapped view is decreased, dimming it.
Styling in React Native
Styling in React Native has a syntax similar to the CSS used on the web. The styling rules are defined as objects that are passed to the style prop of React Native components. The most recommended way of creating styles in React Native is using the StyleSheet component. An example of how the styling is defined is shown in the snippet below.
import { Text, StyleSheet } from 'react-native';

const StyledText = () => {
  return <Text style={styles.text}> Hello World </Text>;
};
const styles = StyleSheet.create({
  text: {
    color: 'red',
    fontSize: 24,
  },
});
React Native Navigation
As many mobile apps won't be made up of a single screen, managing multiple screens and transitioning between them is, therefore, an integral part of mobile development. The navigation solution in React native is provided by the React Native community. The navigation mechanism is not in-built as many would have expected. The recommended third-party library is the react-navigation library. It is an easy-to-use, cross-platform compatible, and easily customizable library that provides routing in both expo and React Native applications.
There are three different types of navigation patterns in React Navigation. These three can then be combined or nested in different ways to build complex navigations. They are:
1. Stack Navigation
This provides a way to transition between screens and manage the navigation history in the form of layers stacked on top of each other. When you navigate to a new route, the new screen is stacked on the previous screen, and when you go back, the screen is popped off the stack. By default, the navigation comes with native animation and gestures suitable for both Android and iOS. Detailed documentation on how this is done using React Navigation is found here. Below is an example of stack Navigation:

2. Tab Navigation
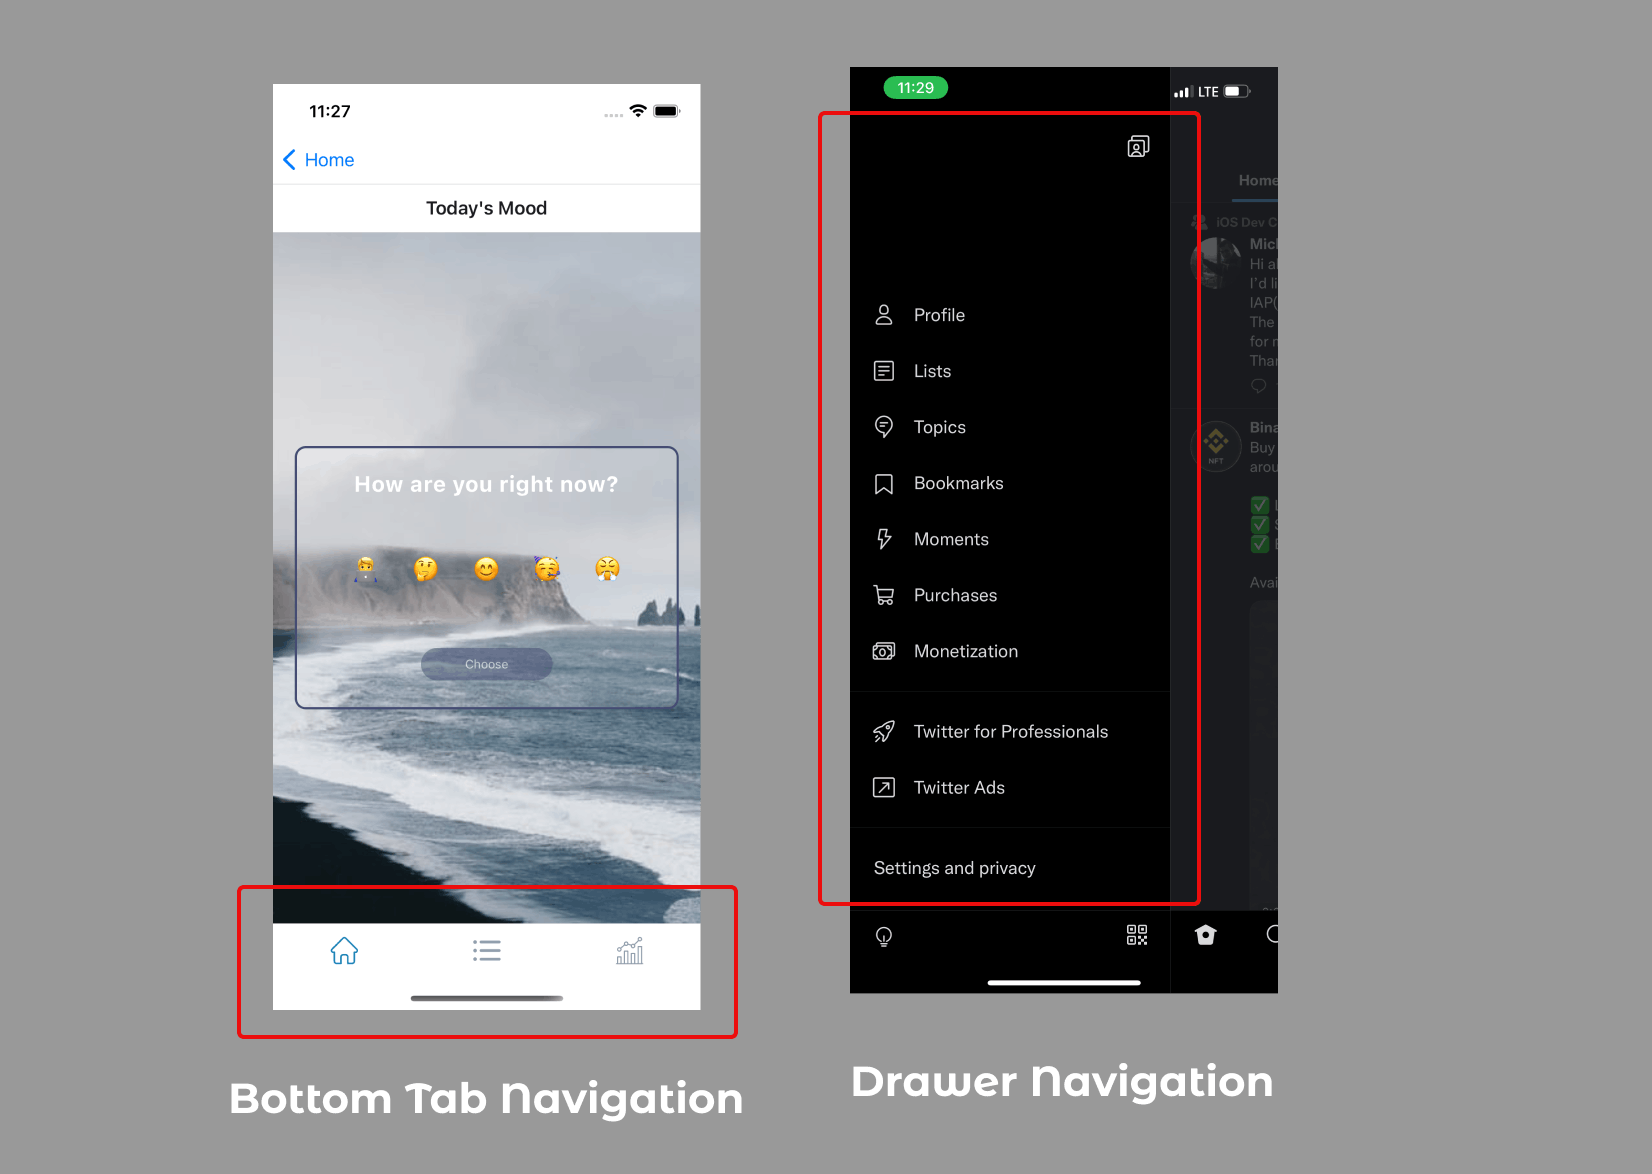
Tab navigation is the most commonly used navigation in most mobile applications. The bottom tabs usually have icons with the text or only the icons most time. The tab navigation can also come in the form of top tabs. Animation and gestures are not added to this form of navigation by default. Continue here for more details.
3. Drawer Navigation.
If you have used Twitter before, you'd notice that there is a drawer on the side that contains a list of other links like the profile, bookmarks, etc. The drawer can be either from the left or the right. This also has an in-built animation and gestures. For more details on how to implement this with React Navigation, check here
Example of Tab and Drawer navigation:

React Native Animation.
Mobile apps are not great enough without sleek animations and gestures. Animation takes anything from one state to another in the smoothest way possible. The basics of animation React Navigation is powered by Animated components, a built-in component in React Native. With this component, you can build small to complex animations in your application.
A popular library also used for animation in React Native is the Reanimated library. It branded the native Animated component with more features and added performance advantages.
Conclusion.
In this article, we gave an overview of what Mobile development using React Native looks like, the basic components, navigation, animation, and styling. To further your learning or kickstart your journey to building amazing mobile apps with React Native, you can find these free resources useful. Try and code along and challenge yourself to add more features beyond the scope of the tutorial.
YouTube: React Native Tutorial for Beginners - Build a React Native App by Mosh Hamedani
A Youtube Series: React Native Tutorial for Beginners by Net Ninja
If you find this useful consider leaving a 👍🏻 and share. You can also connect with me on Twitter @alhakamee_.
Thanks for reading!
